|
Quick Navigation
View Product Index
View Category Index
Popular Resources
Free Poker Table Plans
Learn About Poker Chips
Las Vegas Casino Chips
Custom Tokens Drink
Chips
Poker Resources
Why Cheap Poker Chips Suck
|  |
| Securing
the poker table top to the base
Now that you have your tabletop the way you like it, it's time to prepare
your materials to get the underside completed. Take your two 8'x3"x¾"
strips and cut them into 3 even pieces – just make a mark every
32" and cut.
The resulting six pieces of framing will be used to secure to the tabletop
to the base. These can be used whether you opt to use the 6’ Lifetime
table or stand-alone folding legs (See Figure 6.1).
If you use the stand-alone legs, you can use the six 32” segments
of wood you just cut as framing for the folding legs (See Figure 6.2).
|
|
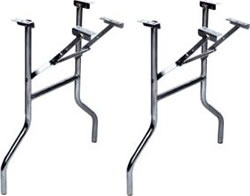
Figure 6.1: Folding poker table legs
|

Figure 6.2: Cutting the corner with a jigsaw
|
|
If you are using the Lifetime table as your base, turn
your poker tabletop bottom side up. Do the same for the Lifetime table
and align the table with the outline you have already made on your tabletop.
You are going to build a snug frame around the outline of the Lifetime
table using the six 32” strips. Just use the table as your guide
when attaching the sub-framing (See Figure 6.3). When complete, the
Lifetime table will fit in this frame like a simplistic square puzzle
piece.
|
|
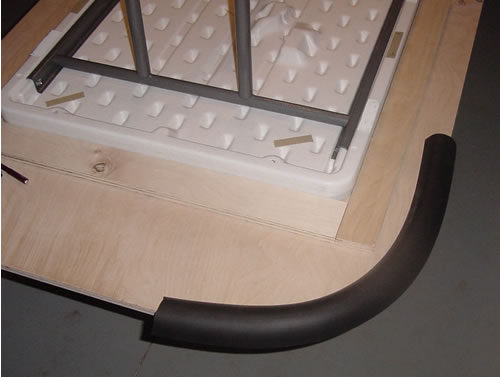
| Figure 6.3: The black foam is for testing the clearance
between the frame and the eventual padded rail. As you can see, the wood
frame and Lifetime table fit together snugly. |
|
The black foam you see on Figure 6.3 is an extra piece
of foam railing I use to ensure that the under carriage framing doesn't
hit the padded railing from underneath. You need to test this out all
the way around the table before screwing anything in. This testing phase
is precisely why I recommended ordering an extra 1' of railing. This
way, you can use the extra to quickly test your frame without dragging
the entire railing all over the place. There will be other uses for
the extra 1' railing later on as well.
Use 8 x 1" wood screws to secure the frame to the
tabletop. Make sure to counter sink the wood screws so you have a nice
flush surface. Two of the corners will not match exactly, but this is
not a big issue, as it is not going to be seen. This is all you need
for the tabletop to sit firmly on the Lifetime table.
Here is what the poker tabletop framing looks like when
you take away the table.
|
|
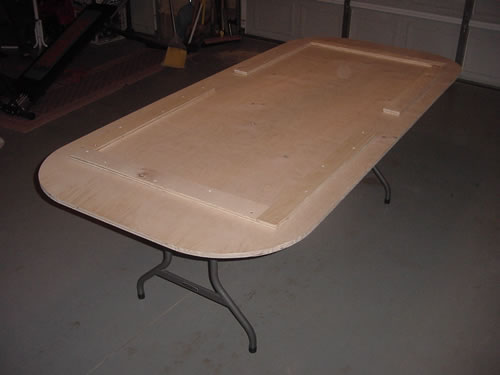
| Figure 7: You are looking at the underside of the plywood
tabletop with the framing, but minus the Lifetime table. Don’t let
the legs you see confuse you. Remember I am using another Lifetime table
as my workbench, and these are the legs you see. |
|
This is a good look at how it is all supposed work underneath
(See Figure 8.1). Notice the heavy-duty ring hanging down. There is
another one just on the other side of the Lifetime table. This is another
optional feature I add to my tables. The ring has a large washer at
the base to help strengthen the fitting. The topside of the ring fixture
has a countersunk washer countersunk. The excess threads are ground
off level with a Dremel Tool. I use some clear tri-polymer sealant to
level out the tabletop surface. Cure this over night before putting
material on the table. This may seem like a lot to go through in order
to hang it on a garage wall, but you really don't want your table sitting
on the ground on the soft railings between poker nights.
|
|
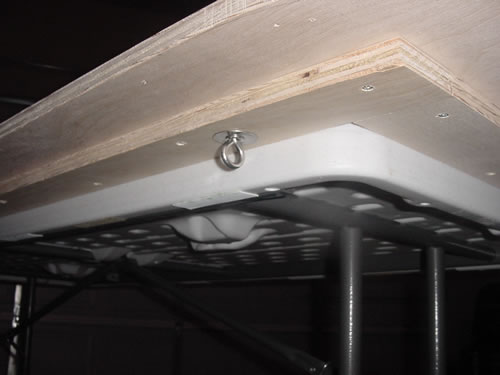
Figure 8.1: Optional hooks to hang
to tabletop while not in use. |
|
If you have a place in your house to have the table set
up full-time, that’s nice, but if not, you have to store it somehow.
This is my solution. I have a 6” chain attachment hanging down
from two studs on the wall of my garage (See
Figure 25.2 for more detailed instructions on installation). The
chains are 48" apart, so the rings hook right in. Studs are on
16” centers, so this solution should work for most people.
I also like to add 4 large internal bumpers (taller than
the pad) to keep the padded rail off the wall (see image below)
|
|
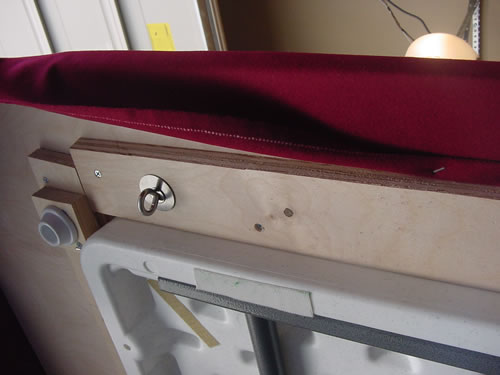
Figure 8.2: Wall bumpers. |
|
| | |