|
Quick Navigation
View Product Index
View Category Index
Popular Resources
Free Poker Table Plans
Learn About Poker Chips
Las Vegas Casino Chips
Custom Tokens Drink
Chips
Poker Resources
Why Cheap Poker Chips Suck
|  |
Build
your own poker table upholstery
You will need either two tables or a saw horse set up,
which I recommend covering up with newspaper or painting cloth (see
Figure 20.1) so they don’t get spray on adhesive all over them.
You’ll need one can of spray-on adhesive for the job. I had great
luck with V&S 581 Foam and Fabric Spray Adhesive. It’s strong
and dries fast, so you’ll need to have everything lined up and
ready to go the moment you start spraying.
|
|
|
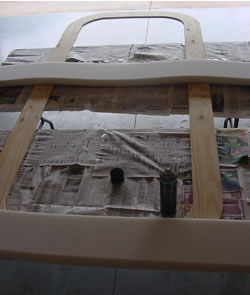
Figure 20.1: Start with the ends
|
Figure 20.2: Padding completed on one end
|
|
Start with the ends. Center the foam length-wise and centered
on the frame. Lift up one end and spray the adhesive on both the foam
and the wood allowing just a few seconds before setting the foam back
down. You don’t need to overdo it on the spray. Use just enough
to secure the foam to the wood. For the moment, just concentrate on
attaching foam to the straight part of the end of the frame. Use your
hand to press down on the top of the foam. This will help the adhesive
catch as much of the foam as possible. |
|
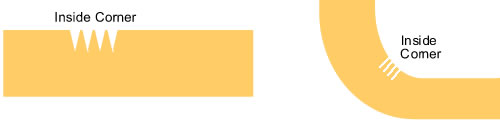
Figure 20.3: Padding completed
on one end |
|
For the corners, you will need to cut out 3 or 4 V-shaped
notches into the inside of the foam to make the turn (see Figure 20.3).
Start out small and increase the size of the notches as much as you
need to make the foam as smooth as possible thru the turn. As soon as
you are happy, repeat the spraying technique for the corners and be
sure to spray between the cuts so they will dry and stay together. There’s
a little extra pressure on the adhesive due to the curve, so hold the
padding down with your hands for a minute or so longer than on the strait
piece before releasing the pressure. See Figure 20.2 for what the final
end should look like. Repeat these steps with the opposite end and corners
before starting with the sides.
The sides are a bit easier. You will most likely end up
with a piece that’s a bit too long and needs to be cut to fit
between the two end pieces. When cutting, leave just a little extra
to form a “tight fit” at the seam. Make as straight of a
cut through the padding as. Use the same spraying procedure as with
the straight runs on the end, but be sure to spray between the seams
of each piece of foam on both sides and stick them together. This will
prevent the seam from being visible through the Naugahyde later on.
Here is what you will end up with.
|
|
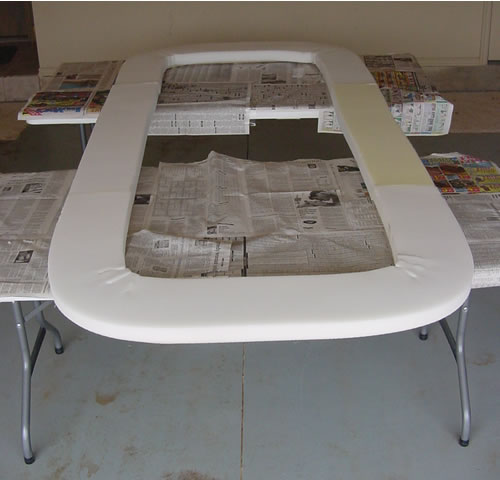
Figure 21: Padding completed for
entire rail |
|
| | |